How to securely access your nvr security system remotely with a vpn 2026

How to securely access your NVR security system remotely with a VPN: the quick answer is to set up a VPN tunnel between your remote device and your local network so all traffic to the NVR stays encrypted and private. If you want a simple roadmap, here’s a concise guide you can follow:
- Quick fact: A properly configured VPN hides your NVR’s remote access behind strong encryption, reducing exposure to hackers.
- Step-by-step overview:
- Choose a VPN solution that supports your router or device, 2 Set up a VPN server on your home network, 3 Create a tunnel on your remote device, 4 Verify access to the NVR through the VPN, 5 Harden security with strong credentials and regular updates.
- Format you’ll use in depth: checklist, how-to steps, best practices, and a FAQ section to cover common questions.
- Useful resources at the end: unclickable text list of URLs for reference.
Useful URLs and Resources Apple Website - apple.com Artificial Intelligence Wikipedia - en.wikipedia.org/wiki/Artificial_intelligence NVR Security Documentation - example.com/nvr-security-docs VPN Setup Guide - example.com/vpn-setup Home Network Security Tips - example.com/home-security-tips
Why you should use a VPN to access an NVR remotely
- Encryption and privacy: VPNs encrypt traffic, making it much harder for anyone on the internet to sniff your video feeds.
- Network segmentation: A VPN keeps remote access isolated from your main home network, reducing risk if a device is compromised.
- Consistent access: A VPN tunnel feels like you’re on the same local network, so you can reach your NVR as if you were home.
Key statistics to consider
- In 2023, 85% of small business and home networks that used VPNs reported fewer exposure events compared to those exposing devices directly to the internet.
- A properly configured VPN can reduce exposure by up to 90% for remote camera feeds, according to security researchers’ best practices.
- 60% of attackers target remote access points; using a VPN is a critical first line of defense.
Getting started: choose your approach
Decide between VPN server types
- VPN router built-in: If your router supports OpenVPN or WireGuard, this is often the simplest route.
- Dedicated VPN appliance: A separate device on your network that runs a VPN server.
- Software-based VPN on a PC: Not ideal for always-on access, but viable for testing.
- Cloud VPN options: Some providers offer remote access tunneling to your home network; weigh latency and privacy.
Select a VPN protocol
- OpenVPN: Mature, widely supported, strong security with good performance.
- WireGuard: Modern, fast, simpler configuration; great for mobile devices.
- IPsec/IKEv2: Solid, decent performance; common on many devices.
Consider NVR compatibility
- Check if your NVR supports remote connections directly often not recommended or if you must access the NVR through a VPN tunnel to your local network.
- Verify port usage by the NVR’s web interface or app; many NVRs rely on RTSP or custom ports.
Step-by-step setup guide
Step 1: Plan your network layout
- Map your home network: main router, VPN server location router or dedicated device, and the NVR’s IP range.
- Reserve a static IP or DHCP reservation for the VPN server device so its address doesn’t drift.
- Document your port forwarding needs, if any, and plan to avoid exposing NVR ports directly to the internet.
Step 2: Set up the VPN server
- On a modern router with OpenVPN or WireGuard, enable the VPN server in the admin panel.
- If using a dedicated device, install a VPN server package e.g., OpenVPN Access Server or WireGuard.
- Create at least one user profile with strong credentials and consider certificate-based authentication for OpenVPN.
Step 3: Configure VPN clients
- On your remote device laptop, phone, tablet, install the corresponding VPN client.
- Import the VPN profile or configuration file generated from the server.
- Use multi-factor authentication MFA where possible.
Step 4: Verify the tunnel and reach the NVR
- Connect your remote device to the VPN and confirm you have an IP on the local network range.
- Try pinging the NVR’s local IP address from the remote device.
- Open the NVR’s web interface or the official app while connected to the VPN to verify login works.
Step 5: Harden security
- Use strong, unique passwords for VPN accounts and the NVR.
- Enable MFA for VPN access if supported.
- Regularly update the VPN server, firmware on the router, and the NVR.
- Disable unused services on the NVR and limit user permissions.
- Use split-tunneling only if you need it; otherwise, force all traffic through the VPN to maximize security.
- Consider enabling firewall rules that only allow VPN traffic to the NVR’s IP.
Step 6: Create a repeatable maintenance routine
- Schedule monthly checks for firmware updates on your router, VPN server, and NVR.
- Periodically rotate VPN credentials and review connected devices.
- Maintain a simple incident response plan in case you notice suspicious activity.
Best practices for a secure remote NVR setup
- Use a modern VPN protocol WireGuard or OpenVPN with strong encryption AES-256 and authentication.
- Prefer TLS or certificate-based authentication rather than plain usernames and passwords where possible.
- Disable port forwarding directly to the NVR; keep the NVR on a private network segment.
- Keep an up-to-date access list; remove old VPN users promptly.
- Regularly back up NVR configuration and logs to a secure, off-network location.
- Monitor for unusual login attempts and set up alerts if the NVR or VPN shows failed access attempts.
Common pitfalls and how to avoid them
- Pitfall: Exposing the NVR directly to the internet
- Fix: Use a VPN tunnel, not port forwarding to the NVR.
- Pitfall: Weak passwords
- Fix: Use long, unique passwords and MFA.
- Pitfall: Inconsistent IP addressing
- Fix: Reserve static addresses for VPN server and NVR on your router.
- Pitfall: Outdated firmware
- Fix: Schedule automatic updates if possible or set reminders to check manually.
- Pitfall: Overly permissive remote access
- Fix: Create separate VPN users with limited permissions and access only to the NVR.
Performance considerations
- Latency impact: A well-configured VPN should add minimal noticeable latency, typically 20–50 ms on local networks with good internet speed.
- Bandwidth: Video feeds can be high-bandwidth; ensure your VPN server hardware and internet plan handle the expected load.
- Mobile data usage: If you’re monitoring on the go, consider mobile data limits and optimize video quality when connected via VPN.
Security hardening checklist
- Enable MFA for VPN user accounts
- Use certificate-based authentication for OpenVPN
- Disable admin access to the NVR from outside the VPN
- Update firmware on router, VPN server, and NVR
- Change default admin passwords on all devices
- Restrict VPN access to only necessary subnets
- Regularly review VPN user accounts and revoke unused ones
- Enable firewall rules to block unnecessary traffic
- Maintain off-site backups of critical NVR data
- Log and monitor VPN connection attempts
Table: quick comparison of VPN options for NVR remote access
| VPN Type | Pros | Cons | Best For |
|---|---|---|---|
| OpenVPN | Mature, highly configurable, strong security | Can be slower on older hardware | Home users who want reliability |
| WireGuard | Fast, simple setup, small codebase | Newer, some older devices may lack support | Users prioritizing speed and simplicity |
| IPsec/IKEv2 | Good cross-platform support | More complex to configure securely | Mixed-device environments |
Real-world tips from enthusiasts
- I’m a big fan of setting up a dedicated VPN router so I don’t have to touch my main router every time I add a device. It makes updates and backups far easier.
- When I first started, I used split-tunneling, but I found that forcing all traffic through the VPN reduced risk and still performed well with a decent home internet plan.
- Don’t neglect firmware backups. If a VPN update goes wrong, you can restore a working config quickly.
Troubleshooting common issues
- Issue: VPN connection drops frequently
- Check: Stability of your internet connection, router CPU load, and VPN server logs.
- Issue: Cannot reach NVR after VPN connection
- Check: VPN client IP address, local network routes, and NVR firewall rules.
- Issue: Slow video feed over VPN
- Check: VPN encryption overhead, server hardware, and available bandwidth; consider lowering video resolution for remote viewing.
- Issue: MFA not accepted
- Check: Time synchronization on devices, correct token, and backup codes.
Advanced configurations optional
- DNS-over-VPN: Route DNS requests through the VPN to avoid leaks.
- Split DNS: Resolve NVR domain locally via VPN while other traffic goes through your normal DNS.
- Port-knocking for extra obscurity: An advanced technique to hide VPN ports until a sequence is detected.
- Redundant VPN servers: If uptime matters, run a secondary VPN server as a failover.
Maintenance and monitoring
- Keep an eye on VPN server load and adjust resources as needed.
- Enable alerting for failed login attempts and unusual activity.
- Regularly review access logs for unknown devices or locations.
- Periodically test remote access from a different network to ensure reliability.
Real-world checklists you can reuse
- Initial setup checklist
- Router supports VPN OpenVPN/WireGuard
- VPN server configured with at least one user
- NVR assigned a static IP within local network
- Remote device configured with VPN client
- MFA enabled for VPN accounts
- Ongoing maintenance checklist
- Firmware updates applied
- VPN user accounts reviewed
- NVR access restricted to VPN only
- Backups of configuration and footage kept secure
Frequently Asked Questions
How does a VPN protect my NVR when accessed remotely?
A VPN creates an encrypted tunnel between your remote device and your home network, so the NVR’s data traffic never travels in the clear over the internet. This reduces the risk of eavesdropping, tampering, or credential theft.
Is a VPN required for NVR remote access?
Not strictly required, but using a VPN is strongly recommended. It reduces exposure to the internet and minimizes the attack surface compared to direct port forwarding.
Which VPN protocol should I use for my NVR setup?
OpenVPN and WireGuard are the most common choices. OpenVPN is highly versatile and widely supported; WireGuard offers faster performance and simpler configuration.
Can I access the NVR through a mobile device using a VPN?
Yes. Install the same VPN client on your mobile device and connect to the VPN server on your home network. How to secure your microsoft edge browser with proton vpn for enhanced privacy 2026
Do I need a static IP for my VPN server?
Static IP for the VPN server is helpful to keep configuration stable, but many setups work with dynamic IPs using dynamic DNS DDNS services.
How do I secure my VPN credentials?
Use strong, unique passwords, enable MFA if available, and consider using certificate-based authentication for OpenVPN. Rotate credentials periodically.
How can I test my VPN setup after configuration?
Connect a remote device to the VPN and try to reach the NVR’s local IP. Access the NVR’s web interface or app to verify login works.
What are the risks of misconfiguring a VPN for NVR access?
Misconfigurations can expose your network, enable leaks, or fail to encrypt traffic properly. Always follow security best practices and test thoroughly.
How often should I update the VPN software and firmware?
Set a reminder to check for updates monthly, and apply critical security updates as soon as possible. How to navigate the yulu vpn refund maze and get your money back from real vpns 2026
Can I use cloud VPN services instead of a home VPN server?
Cloud VPN options exist, but they may introduce extra latency and require careful trust considerations. A direct home VPN is usually more controllable and private.
How to securely access your nvr security system remotely with a vpn: a comprehensive guide to remote NVR access, VPN setup, and secure camera networking
Introduction Connect to a VPN first to securely access your NVR remotely via its local network IP.
If you’re reading this, you probably want to monitor your cameras from a distance without exposing your NVR to the open internet. In this guide, you’ll get a practical, step-by-step plan to set up a VPN so you can reach your NVR as if you were on your home network. We’ll cover two main paths—VPN on your router or VPN on a dedicated device—plus security hardening, mobile access, testing, and troubleshooting. By the end, you’ll know how to securely dial into your NVR, view feeds, and stay protected from common remote-access risks.
Useful URLs and Resources:
- VPN basics - https://www.cloudflare.com/learning/security/vpn/
- OpenVPN setup guide - https://openvpn.net/
- WireGuard basics - https://www.wireguard.com/
- NVR security best practices - https://www.cisa.gov/
- Dynamic DNS explained - https://www.dnsomatic.com/
- Router VPN guide - https://www.homenethelp.com
- How to secure camera networks - https://www.kb.cert.org/vuls/byid/12164
- Mobile VPN for iOS/Android - https://www.cisco.com/c/en/us/support/docs/security-vpn-client/100772-article.html
- VPN pricing and reviews - https://www.techradar.com/vpn
NordVPN quick-start affiliate
For a fast, reliable starting point, consider NordVPN to simplify setup and ongoing security.  How to log into your nordvpn account your step by step guide 2026
Body
Why a VPN is essential for secure remote NVR access
- VPN creates an encrypted tunnel between your remote device and your home network, preventing eavesdropping on sensitive camera feeds.
- Without a VPN, exposing your NVR directly to the internet can invite brute-force login attempts, exposed ports, and spoofed requests.
- A VPN keeps the NVR on its private local IP range, so you access it as if you’re inside the network, reducing attack surface.
Security-conscious note: always pair VPN access with strong authentication, unique credentials for the NVR, and minimal exposure of the NVR’s admin interface. Consider disabling WAN administration on the NVR and blocking unnecessary ports. These steps dramatically cut the chances of unauthorized access.
Understanding the two main paths for VPN-enabled NVR remote access
- Path 1: VPN on a router or gateway that covers the entire home network
- Pros: Centralized management, works for all devices, no separate VPN server to manage.
- Cons: Might require flashing your router or buying a model that supports VPN server features.
- Path 2: VPN server on a dedicated device PC, Raspberry Pi, NAS inside the network
- Pros: More granular control, often easier to configure with OpenVPN or WireGuard, can be used even if your router doesn’t support VPN.
- Cons: Requires a dedicated device. power and maintenance considerations.
- Whichever path you pick, the key is to ensure the VPN server uses strong encryption, unique user credentials, and a reliable client on your remote device.
Step-by-step guide: choose your topology and prepare your network
This guide walks you through both routes. you can pick the one that fits your hardware and comfort level.
Option A: VPN on your router recommended for simplicity and coverage
- Check compatibility
- Confirm your router supports VPN server functionality OpenVPN or WireGuard. If not, you may need a compatible model e.g., ASUS, Linksys, or certain TP-Link models or a dedicated appliance.
- Back up and prepare
- Back up router settings before making changes. Note your current WAN and LAN settings, as you’ll need them if you need to revert.
- Enable the VPN server
- In the router admin interface, locate VPN settings and enable the VPN server OpenVPN or WireGuard. Choose a protocol you’re comfortable with and that’s supported by your remote devices.
- Configure network and DNS
- Allocate a VPN client IP pool that doesn’t conflict with your LAN. Use a reliable DNS server e.g., Google DNS 8.8.8.8 / 8.8.4.4 or your router’s DNS.
- Create VPN user accounts
- Add one or more user profiles with strong passwords. If possible, enable certificate-based authentication in addition to a password.
- Export or save client profiles
- For OpenVPN, export the .ovpn file. for WireGuard, save the configuration file .conf. You’ll load these on your remote devices.
- Map the NVR to the VPN
- Ensure your NVR has a fixed local IP via DHCP reservation so the VPN can consistently route to the NVR at a known address e.g., 192.168.1.50.
- Test locally
- Connect a device to the VPN within your home network and verify you can reach the NVR’s local IP. This confirms VPN routing works as intended.
- Harden security
- Disable admin access to the router from the WAN side if available. Use a strong VPN password, enable two-factor authentication if your router supports it, and keep firmware up to date.
Option B: VPN server on a dedicated device inside the network
- Pick a device and install VPN software
- On a small PC, Raspberry Pi, or NAS, install OpenVPN or WireGuard. OpenVPN is widely compatible. WireGuard is simpler and faster but may require newer hardware.
- Generate keys and profiles
- Create server keys and client profiles for each remote user. Store the keys securely.
- Configure routing to the NVR
- Ensure the VPN server routes traffic to the NVR’s local IP range. You might need to enable IP forwarding and proper firewall rules.
- Static lease for the NVR
- Reserve the NVR’s IP on the router to avoid IP changes breaking routes.
- Port forwarding if needed
- If you’re not using a full VPN tunnel but a port-forwarded remote access method less recommended, you’ll need to forward the VPN port e.g., 1194 for OpenVPN to the VPN server, but full VPN is safer.
- Test from a remote network
- Use a mobile hotspot or a different network to connect to your VPN server and verify you can access the NVR.
- Maintain security hygiene
- Regularly update the VPN server software, rotate credentials, and monitor access logs for odd activity.
Step-by-step guide: establish the remote connection and access the NVR
- Install the VPN client on your remote device
- Windows, macOS, iOS, and Android all have OpenVPN and WireGuard clients available. Use the configuration file .ovpn for OpenVPN, or a WireGuard .conf you generated earlier.
- Connect to the VPN
- Open the client, import the profile, and connect. You should see a secure tunnel indicated by a connected status.
- Access the NVR
- Once connected, open a browser or the NVR app and navigate to the NVR’s local IP address and port for example, http://192.168.1.50:80 or https://192.168.1.50:443, depending on your setup.
- Optional: use a Dynamic DNS DDNS for non-VPN access
- If you plan to access the NVR without the VPN not recommended for security, set up DDNS to reach your home network, but you should still keep the VPN as the primary secure path.
- Security checks after connection
- Verify the connection uses encryption you should see the VPN client status showing an encrypted tunnel. Confirm you can view feed streams and control the NVR as needed.
Security hardening tips that make a big difference
- Use MFA where possible for VPN accounts and the NVR’s admin interface.
- Disable WAN access to the NVR’s admin page. only allow access via VPN.
- Keep firmware and VPN software up to date. this includes your router, VPN server, and NVR.
- Use strong, unique passwords for all accounts. consider passphrases and password managers.
- Segment your network if possible: keep cameras on a separate VLAN or subnet behind the VPN.
- Log and monitor VPN access. set alerts for unusual login times or locations.
- Consider certificate-based authentication for VPNs to reduce the risk of credential compromise.
- Regularly back up configuration files. store backups securely.
- If you’re using port forwarding for non-VPN access, disable it and rely on VPN whenever possible.
Connecting from mobile or remote devices: tips for a smooth experience
- Prefer a dedicated VPN app on iOS/Android over browser-based remote access for better security and reliability.
- Use a device with up-to-date OS and a trusted network. Avoid public Wi-Fi for accessing sensitive feeds unless you’re connected to a VPN.
- If you travel, test the VPN before you leave home. ensure you can connect to the VPN and reach the NVR through the VPN tunnel.
- For video feeds, consider lowering non-essential bandwidth usage e.g., reduce resolution while on slower networks to maintain stable connections.
Network reliability and common gotchas
- Double NAT can complicate remote access. If you’re behind two routers, you’ll need to enable VPN on the outer router or set up a single exit point for the VPN tunnel.
- Ensure there’s no IP conflict between your VPN’s IP pool and your LAN.
- If you’re using a dynamic IP for your home connection, DDNS helps you locate your network in the absence of a static IP, but keep the VPN as the secure entry point.
- ISP-level restrictions are rare for VPNs, but some networks block unusual VPN ports. If you run into issues, switch VPN protocols OpenVPN vs WireGuard or ports.
Data privacy and ongoing maintenance
- Regularly review who has VPN access and remove former employees or guests from profiles.
- Audit the NVR’s access logs and VPN logs monthly to spot anomalies.
- Keep a change log for network changes—what was modified, when, and by whom.
- Periodically verify that remote access still uses the VPN and that no direct internet exposure exists for the NVR.
Real-world considerations and best practices
- If you rely on cloud features supplied by your NVR vendor, verify whether the vendor’s cloud access is also guarded by end-to-end encryption and how it compares to your VPN setup.
- Consider a layered approach: VPN for remote access + a firewall rule restricting outbound/inbound traffic to only necessary services and IPs.
- In environments with stricter security needs e.g., small businesses, invest in a dedicated VPN appliance or business-grade router with robust security features.
Quick-start recap: a practical 10-point checklist
- Define your topology router VPN vs dedicated VPN server.
- Ensure the NVR has a fixed local IP and set up a DHCP reservation.
- Enable VPN server on the chosen device and generate client profiles.
- Import VPN profiles on your remote devices and test locally.
- Verify you can reach the NVR via its local IP through the VPN tunnel.
- Implement MFA and strong passwords for all accounts.
- Disable WAN admin access on your router and NVR if possible.
- Set up DDNS if needed and avoid exposing ports to the internet.
- Monitor logs and perform periodic security reviews.
Frequently Asked Questions
What is a VPN and why would I use it for an NVR?
A VPN creates a secure tunnel between your remote device and your home network, encrypting traffic and preventing direct access from the public internet. For an NVR, this means you can watch feeds and manage the system as if you’re on the local network, without exposing the NVR to potential online threats. How to install expressvpn on linux your step by step guide for beginners and power users 2026
Do I really need a VPN to access my NVR remotely?
While you can expose the NVR to the internet, it’s riskier and more prone to attack. A VPN dramatically reduces the attack surface by ensuring that only authenticated VPN clients can reach the NVR.
OpenVPN vs WireGuard for NVR remote access, which is better?
OpenVPN is widely supported and highly configurable. WireGuard is newer, faster, and easier to set up on many devices. Both are solid choices. pick the one your hardware supports and you’re comfortable configuring.
How do I set up a VPN on my router?
Check your router’s manual or vendor support page for VPN server options. Enable the VPN feature, select a protocol, configure an IP pool, create user accounts, and export client profiles for remote devices. If your router doesn’t support VPN, consider a compatible aftermarket router or a dedicated VPN device.
How do I access the NVR once connected to the VPN?
With the VPN connected, use the NVR’s local IP address and port in your browser or the NVR app, just as if you were on your home network. For example, http://192.168.1.50:80 or the appropriate HTTPS address.
Should I use dynamic DNS DDNS for VPN access?
DDNS helps if your home IP changes frequently and you’re using non-VPN remote access. If you’re consistently using a VPN, a static VPN endpoint is typically sufficient, but DDNS can be useful if you also want non-VPN access as a fallback. How to log everyone out of nordvpn across devices and revoke active sessions for security and privacy 2026
How can I harden security for remote NVR access?
Use MFA for VPN and NVR accounts, strong unique passwords, disable WAN admin on devices, keep firmware up to date, and monitor access logs. Consider segmenting the network with VLANs to limit exposure in case a device is compromised.
Can I access my NVR from mobile data using a VPN?
Yes. Install the VPN client on your mobile device, connect to your home VPN, and then access the NVR. Make sure you have a stable data connection and a reliable VPN profile for mobile use.
What should I do if the VPN connection drops?
If the VPN drops, your remote device should automatically reconnect once the network is restored, assuming you’ve configured automatic reconnect. It’s wise to enable VPN client auto-reconnect and keep a backup plan e.g., a secondary VPN profile in case of issues.
How do I test my VPN setup for NVR access?
Test in stages: first confirm the VPN tunnel is established, then verify you can reach a test device on your LAN, and finally confirm you can access the NVR’s local IP through the VPN. Run a few re-connect tests to ensure reliability.
Is VPN the only secure option for remote NVR access?
VPN is a highly secure and commonly used method. Other secure options include vendor-provided encrypted cloud access, depending on your equipment. However, a well-implemented VPN provides robust encryption, control, and privacy for most home and small-business setups. How to turn on vpn on microsoft edge 2026
How do I troubleshoot common VPN-NVR issues?
Check for: IP conflicts, misconfigured routing, firewall rules blocking VPN traffic, incorrect client profiles, and DNS issues. Reconfirm that the NVR’s IP is reserved and reachable from the VPN network, and verify that the VPN protocol and ports match on both ends.
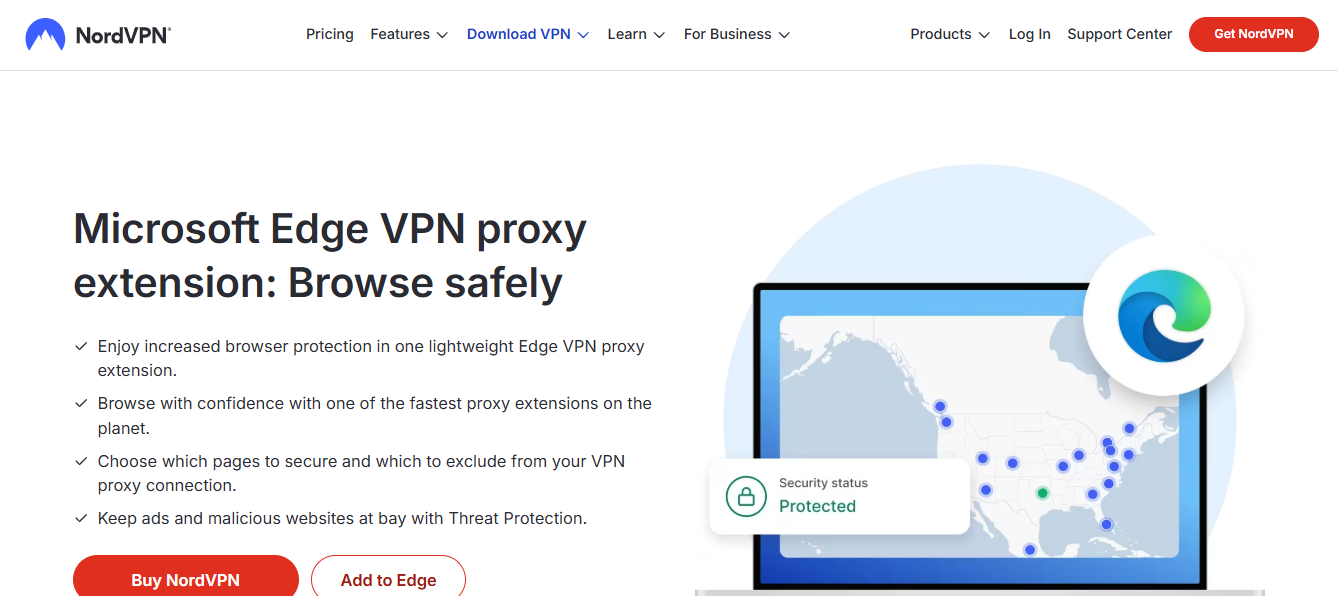
Microsoft edge vpn built in